In this How to post we will teach you what are labels and how to create them in Jira to boost your issue management. Discover the power of labels, dive in now!
Table of content

Step-by-step guide to create labels in Jira
1. Select Issue: Open the issue you want to label
2. Labels: Scroll down and seek labels window
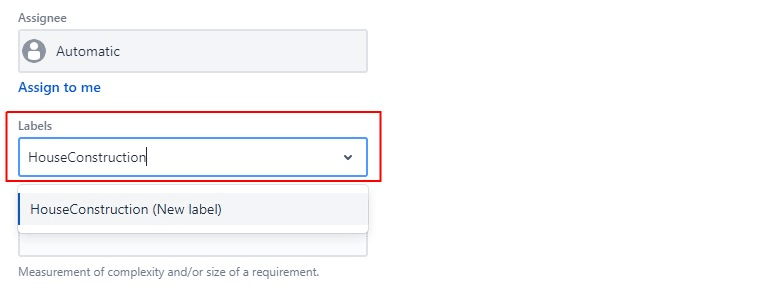
3. Select label: Either pick from recommended labels or create a new one
Step-by-step guide to delete labels in Jira
1. Select Issue: Find the issue where you want to modify or delete the label
2. Labels: Click on the box which says labels
3. Delete: Next to the applied label will apear a small cross, click on it and the label will be deleted
4. Modify: If you want to change the label to a new one simply write it down or select from recommended labels

Why should you use labels in Jira?
Labels make it easy to find stuff. For instance, you can search for issues that have been assigned a particular label. It's important to note that labels are case-sensitive (for all Jira versions before 7.10), requiring an exact match for successful search and filtering.
Additionally, you can click on a label to navigate to the Issue Navigator and view a list of all issues associated with that label. Unlike some other ways to sort things, like distinct issue types and statuses, anyone can make labels, and they work on all projects. Another benefit is applying multiple Labels to a single issue. For instance, an issue could carry both the "GarageConstruction" and "HouseConstruction" Labels, allowing you to place it in multiple searchable groups simultaneously. This functionality might come handy for pinpointing issues related to specific parts of your project.

Happy labeling!
Want to learn more about Jira? Check out our blog.

More Jira Content
Join the Club
Join our email list and get access to specials deals and much more!